
Course environment#
During this course, we use a set of tools that help make learning easier: We will use:
JupyterLab as a development environment accessed using a normal web browser,
the cloud computing platforms Binder and CSC Noppe to run JupyterLab in an environment in which all necessary libraries have already been installed,
gitand GitHub for version control and documentation,Presemo for interactive questions during the lectures,
Discord for communication between the University of Helsinki students, the course assistants, and the teachers.
You can clone every week lessons from the following
gitrepository: Automating-GIS-processes/notebooks.git
JupyterLab: run code online I#
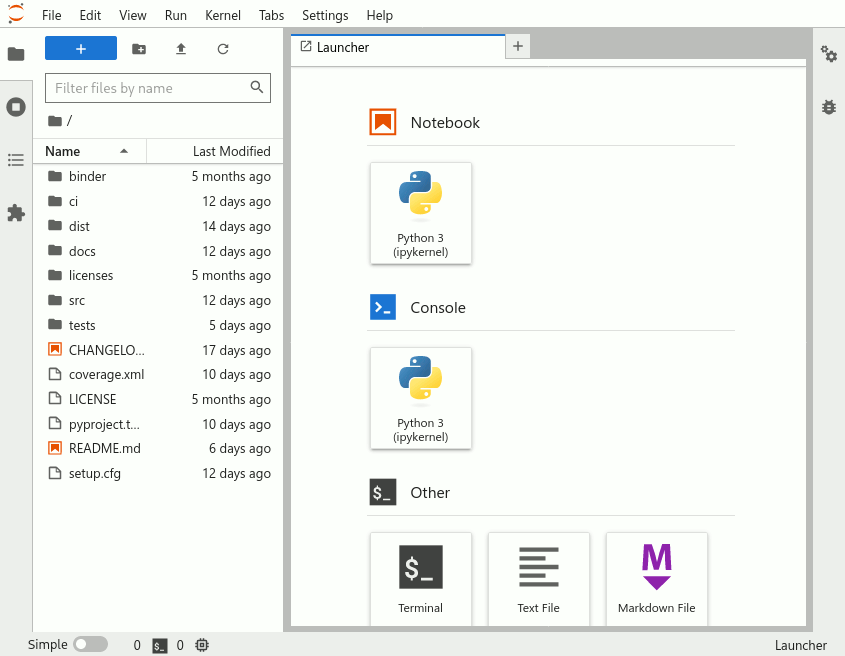
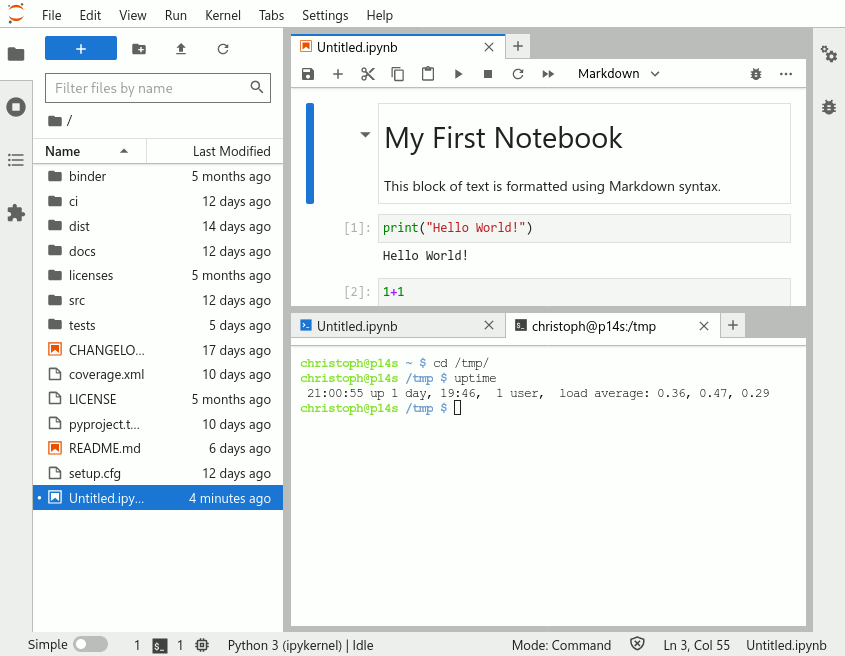
JupyterLab is an open-source web-based integrated development interface (IDE) for carrying out data science. Its interface consists of several components, including a file browser, a terminal, and a text editor, and can be extended using various plugins.
At the core of JupyterLab lies the concept of notebooks. Jupyter Notebooks (file extension .ipynb when used with Python) are documents in which program code can be interleaved with rich text elements, figures, or tables. Such a format is perfect for documenting a reproducible data science workflow in an interactive manner.
We use Jupyter Notebooks in JupyterLab as the default programming environment during this course. All of the course material can be directly opened in a JupyterLab interface on cloud computing platforms: trying out the programming examples yourself is always just one click away.
Cloud computing platforms: run code online II#
Course pages that include programming examples or exercises can be launched as interactive notebooks in Binder or CSC Notebooks using the buttons in the Rocket menu at the top of the page.
(#launch-buttons)= 
We will use two different cloud computing platforms (Binder and CSC Noppe) to access interactive versions of the lessons, and to work on the weekly exercises. You can use them with any compyter, as long as it has a reasonably fast internet connection and a web browser (just please don’t use Internet Explorer).
Note:The CSC Noppe platform is only accessible to students and staff at Finnish universities and research institutes.
Binder#
Binder (mybinder.org runs Jupyter Notebooks in a web browser, in a customised environment. The source files are stored in a GitHub repository; Binder fetches them on first launch. Binder does not require the user to log in. Simply click on the launch button at the top of a notebook page, and wait for Binder to load the exercise or lesson:
CSC Noppe#
CSC Noppe is a platform offered by the Finnish IT Center for Science, a publicly-owned company that supports research, education, and culture in the country with computing infrastructure. CSC Noppe works similar to Binder in the sense that its primary purpose is to run Jupyter Notebooks in a browser window. It is tailor-made for education purposes, offers more features (such as a persistent data directory), and is free to use for students and staff at Finnish universities.
To start using CSC Noppe:
Head to noppe.csc.fi, and log in with your university credentials.
Then, choose ‘Join workspace’, and enter the join code
1xxnbs95am47In the section ‘My workspaces’, you should now see ‘Automating GIS processes 2024‘ with one application: click the ‘power button’ on the right side to start it.

Important:CSC Noppe have seen a new, vastly improved version since last year’s course, some features have not yet been fully implemented.For this reason, the ‘launch button’ on top of interactive pages takes you to the main page of CSC Noppe only, from where you still have to manually start the course’s application.
Caution:Everything you save within themy-workdirectory should persist between runs. However, make sure you save finished and unfinished work also in another place, to be on the safe side, for instance, by committing and pushing it to your personal git repository.
Git and GitHub: keep track of changes#
One of the core goals of this course (besides learning how to program) is to learn how to use version control with git and how to store your code (publicly or privately) on GitHub.
git is a version control software (developed by a rather famous Finn: Linus Torvalds - the creator of Linux) that is used to track and store changes in your files (e.g., software source code) and recording the history of past changes. Git stores files in a ‘repository’, which you can simply think of as a directory tree containing all files related to a project. Git is widely used by professionals to keep track of their work and to collaborate with other people.
GitHub is a web-based git repository hosting service and social network. It is the world’s largest online storage space for collaborative working. It is a place to share your code either openly with the entire world, or only with your colleagues who work on the same project. GitHub provides an easy-to-use web-interface to your files, which you can use to explore code and documentation of many projects, for instance, the source code of the teaching material of this course.
Both git and GitHub provide many more features than the ones mentioned here, but for now we are happy to understand the basic idea of what they are.
Voting and Polling: make yourself heard#
During the lecture, there will be times when we’ll want to ask you short questions: how easy or difficult a particular exercise felt, or what part of last week’s content you would want to hear more about.
You can find the current poll or question at presemo.helsinki.fi/autogis
Note:The poll is active only during the lessons. If you access the website outside the lecture time, chances are high that you’ll see nothing but a white page.
Discord: connect with others#
Throughout the course, we will use one main channel for communication: an online application called Discord that is designed for team collaboration. Post your questions about the lessons and exercises there, answer other peoples’ questions (and gain academic karma), and engage in discussions about anything else concerning the course.
All enrolled students have received an invitation to the course’s Discord workspace, let us know if you haven’t.
![]()
[ ]: