Python in QGIS
The core application and libraries of QGIS are programmed in C++. Nevertheless, Python plays an important role in its ecosystem: Most of the pre-installed plugins and even some of the data provider modules are written in Python, and virtually all functions of the interface and the libraries are exported to a Python API (Application Programming Interface). It takes only moderate effort to author extensions to QGIS which integrate seamlessly into its user interface, create stand-alone applications using components of QGIS, such as a map window or a data backend, or run custom scripts within QGIS. To really dive into using Python in QGIS, see the PyQGIS Developer Cookbook which walks you from easy Hello World examples to writing your own applications.
Today, we will concentrate on basic functionalities of Python in QGIS, or PyQGIS for short. You will learn to run code from the integrated Python console, then write a simple Python script and finally apply the script’s functionality to your very own plugin.
Sample data for this tutorial
To get us started, we’ll need some data. Open QGIS and connect to the City of Helsinki’s WFS service from Layer > Add layer > Add WFS layer:
Create a new connection to URL http://kartta.hel.fi/ws/geoserver/avoindata/wfs and load the layer list. Select, for example, the Metro railway lines (Seutukartta_liikenne_metro_rata). Make sure the coordinate system is set to a projected one, like ETRS89/GK25FIN (EPSG:3879) before adding the layer.
Running PyQGIS code in console
Now that we’re set, let’s open QGIS’s Python console and get to work!
Open it from Plugins > Python console or use the shortcut
Ctrl+Alt+P on your keyboard.
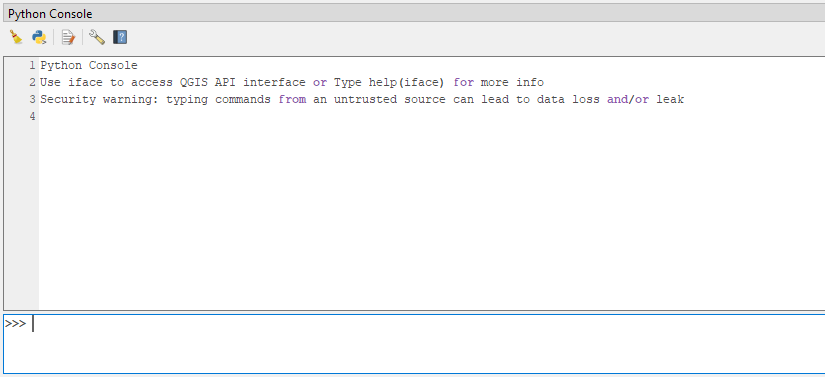
Console
By default an iface object is imported, which allows the access to the currently active QGIS instance’s user interface. For example, we can easily retrieve the active (selected) layer, then access its type, name, and count its features:
# Get active layer:
>>> layer = iface.activeLayer()

# Let's see what we got
>>> print(type(layer))
<class 'qgis._core.QgsVectorLayer'>

>>> print(layer.sourceName())
Seutukartta_liikenne_metro_rata

>>> print(layer.featureCount())
3
The layer we got is an object of class QgsVectorLayer, which in turn is within QGIS’s core module. There are seven modules in total each housing classes critical for the program.
Above, we call QgsVectorLayer’s methods like featureCount(). You may read more on the methods in the documentation or call help() on the object for the same information:
>>> help(layer)
Help on QgsVectorLayer in module qgis._core object:

class QgsVectorLayer(QgsMapLayer, QgsExpressionContextGenerator, QgsExpressionContextScopeGenerator, QgsFeatureSink, QgsFeatureSource)
 |  QgsVectorLayer(path: str = '', baseName: str = '', providerLib: str = '', options: QgsVectorLayer.LayerOptions = QgsVectorLayer.LayerOptions())
 |  Constructor - creates a vector layer
 |
    ...
Like the documentation shows, we can use a method to access the features (=rows on the attribute table) of the layer. Let’s loop through the features and print out attributes from each feature:
>>> for feat in layer.getFeatures():
        # attributes() returns a list of attributes assosiated with that feature
        # we'll print the second entries on the lists, which correspond to the 'metrorata' column
...     print(feat.attributes()[1])
Vuosaari
Länsimetro
Mellunmäki
If the features are geographical, they’ll have geometry as well as attributes. The geometry objects have a method for calculating the length of an feature in map units. We’ll use this to our advantage and create a simple program for summing up the total length of line features in the selected layer and print this out in kilometers:
# variable to house the sum of the lengths
>>> total_length = 0

>>> for feat in layer.getFeatures():
...    geometry = feat.geometry()
...    total_length += geometry.length()

# printing and transforming the result (rounded to one decimal point) to km
>>> print("Total length of features in layer "+ layer.sourceName()+ " is:", round(total_length/1000, 1), "km")
Total length of features in layer Seutukartta_liikenne_metro_rata is: 34.8 km
Creating PyQGIS scripts
Great! But what if we want to show someone our cool function or reuse the code? Thankfully QGIS also includes a simple code editor, from which we can run, edit and save Python scripts. Click the middle icon on the top row of the console and an editor with blank text field should appear.
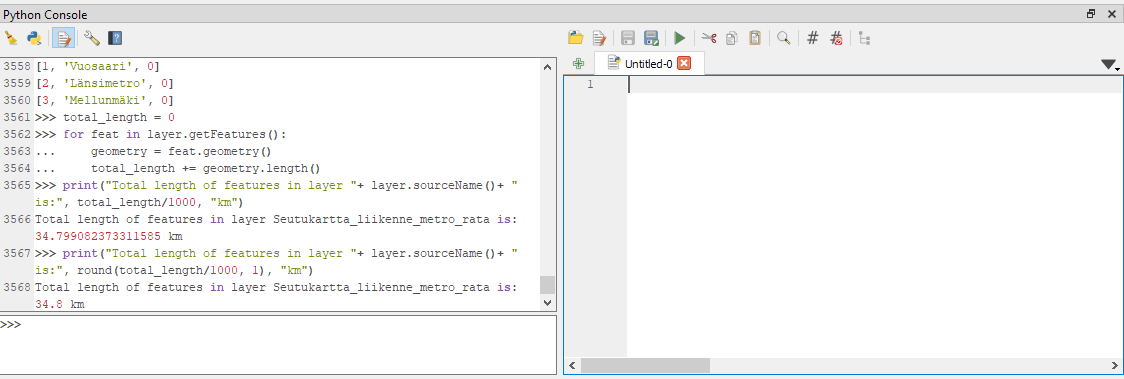
Console and editor
Next, apply the code created previously and make a function. The function gets the active layer, calculates the length of its features and then prints the result in the console. Although it’s in poor form to have so many separate tasks for one function, we do it like this to make things more straightforward later on.
def lineLengthCalc():
    """Sums together the length of features in a line type vector layer, then prints the result in km."""
    # get the current active layer
    layer = iface.activeLayer()

    total_length = 0

    for feat in layer.getFeatures():
        geometry = feat.geometry()
        total_length += geometry.length()

    # print out the result
    print("Total length of features in layer "+ layer.sourceName()+ " is:", round(total_length/1000, 1), "km")

# call the function
lineLengthCalc()
Run the script to make sure it works. After that, save the result as a script file lineLengthCalculator.py. You may open it anytime from the code editor.
Next up, we’ll apply the script code to an extremely simple plugin.
Creating QGIS plugins
Note
The instructions below have been created for Windows systems. While all of the instructions can be replicated on other operating systems, platform differences do apply.
Plugins extend the functionality of the base installation of QGIS. Written in Python, they can be shared via the official plugin repository if they pass the requirements or be installed from .zip packages. Whatever the method, a handful of files is always required. These include the main code .py files, files relating to the user interface and a metadata text file. Creating these by hand would be tedious and time consuming – thankfully it’s also needless, since we can get a plugin to do it for us!
Next, open the plugin manager (Manage and install plugins) and install two plugins that’ll help us greatly: Plugin Builder and Plugin Reloader. If you can’t find these, make sure Experimental plugins are enabled from plugin manager settings. Builder will create a plugin base in which to apply the functionality and Reloader will greatly help in testing the plugin.
Creating the plugin base
Open up Builder and start filling the fields as shown below. Since we’re only creating a toy example, no need to be too serious:
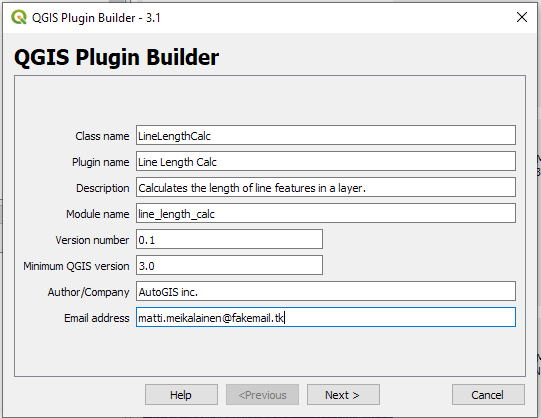
Plugin builder beginning
You may keep the default settings throughout the wizard until the final window (Select output directory). On this example, we’ll want to create the plugin directly to where QGIS installs them, in the active user profile. The path to this folder can be a tricky one, but you’ll find a shortcut from QGIS’s toolbar: Settings > User Profiles > Open active profile folder. This should open a file navigator in a location with some folders and other files. Click onwards to one of the folders: Python > plugins. This is QGIS plugin’s default installation folder. Example location below:
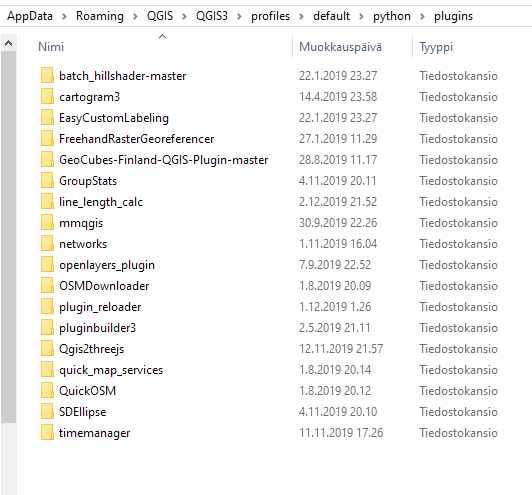
Folder location
Copy the path to this location and paste it as Plugin Builder’s output directory:
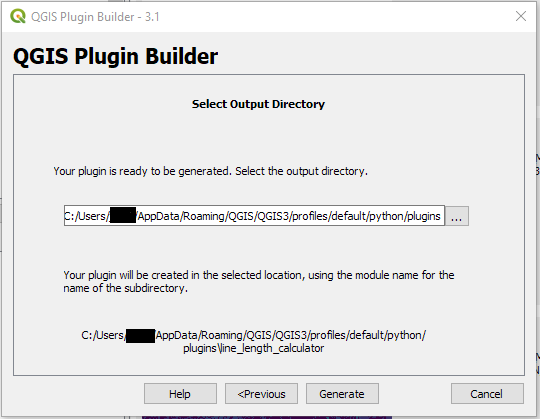
Plugin builder output
Nice nice! Now just generate the plugin. You may get an error about compiling resources, but we’ll ignore that for now. Check the python > plugins folder and you ought to find the freshly made plugin.
Initializing
The plugin’s not quite ready for use yet, we have to make one more rather tedious thing to make it functional. Open line_length_calculator folder and you’ll find a file called resources.qrc. This file’s required by the ui system (Qt), but we need to compile it to a .py file before the plugin will run (a more detailed explanation here). For this purpose, we’ll create something called a batch file.
Please note that this approach made for Windows computers. See Ujaval Gandhi’s instructions for Mac and Linux. You’ll need to install something called pb_tool. Windows users might also find this tool handy if you want to get into serious plugin development.
Create a new plain text file in the plugin folder and copy the following commands to that file.
Note
Replace the filepath with the path
to your computer’s installation. At the very least you’ll need to
replace QGIS 3.X with the version number of your installation, e.g. QGIS
3.4. The installation could also be somewhere else or in location
"C:\OSGeo4W64..." Read more
here.
@echo off
call "C:\Program Files\QGIS 3.X\bin\o4w_env.bat"
call "C:\Program Files\QGIS 3.X\bin\qt5_env.bat"
call "C:\Program Files\QGIS 3.X\bin\py3_env.bat"

@echo on
pyrcc5 -o resources.py resources.qrc
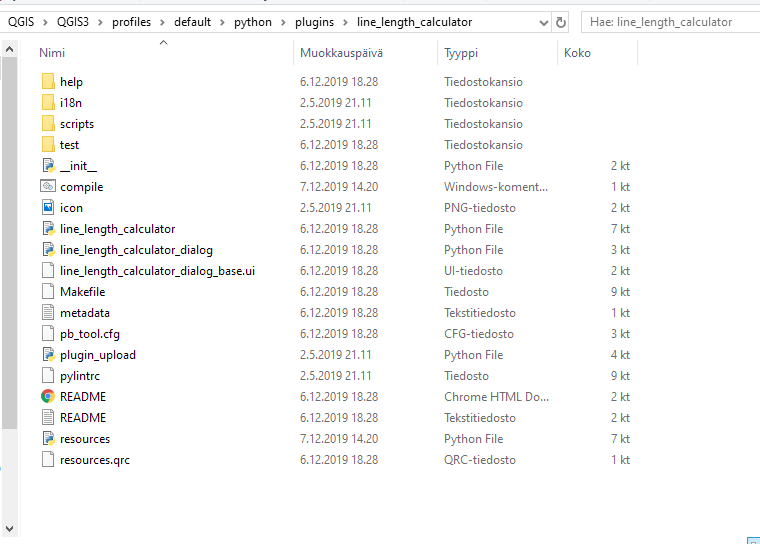
Save the text file with the file format marking as compile.bat. Then simply double click to run it. If all goes well, a new resources file should pop up: this time it’s Python code. You plugin folder should look something like this:
After compiling the plugin
Developing the plugin
Now we can get to business. First restart QGIS and then open the plugin manager. Our new plugin should be listed in installed plugins. Click it active. A new icon should appear both on the Plugins drop-down menu and on the top toolbar. Run the plugin:
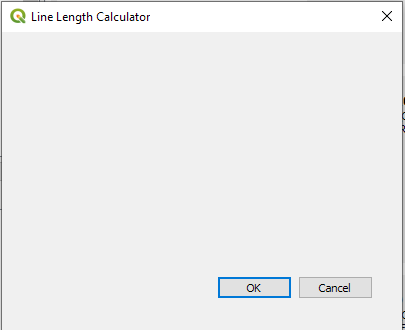
Cool! Too bad it doesn’t do anything yet – all the default buttons do is close the window. We’ll fix that next.
Go back to your plugin’s folder. Open up the Python file line_length_calculator.py in any code or text editor, for example IDLE.
This file, automatically created by Plugin Builder, contains all the necessary elements to quickly get your plugin running. It for example imports some necessary methods from QGIS’s modules (we didn’t need to do this when scripting, since most necessary methods are imported automatically to QGIS’s own Python console). See also how you plugin is a class that includes many methods and that a reference to the interface is saved at the very beginning as self.iface. We’re not interested in most of the content, however.
Scroll down to the very bottom of the file and you’ll find a method called run. This section of the code is activated any time the user activates the plugin. Paste the method lineLengthCalc from the script we created earlier below the run method. Make sure it’s correctly indented!
Now all we need is some handy way for the user to call the method. For that, we’ll need to do a bit of user interface design.
Adding UI elements
Like mentioned earlier, the user interface of plugins (and QGIS in general) is handled by a flexible ui framework called Qt. We could add elements like buttons programmatically, but there’s also a handy graphic interface packaged with most QGIS distributions. Open Qt Designer with QGIS 3.xx custom widgets.
In the New Form dialog, select Open… and navigate to your plugin’s folder. From there, you ought to see a .ui file called line_length_calculator_dialog_base.ui. Select this. The UI, called dialog, should look similar to how it looks in QGIS (that is, bland).
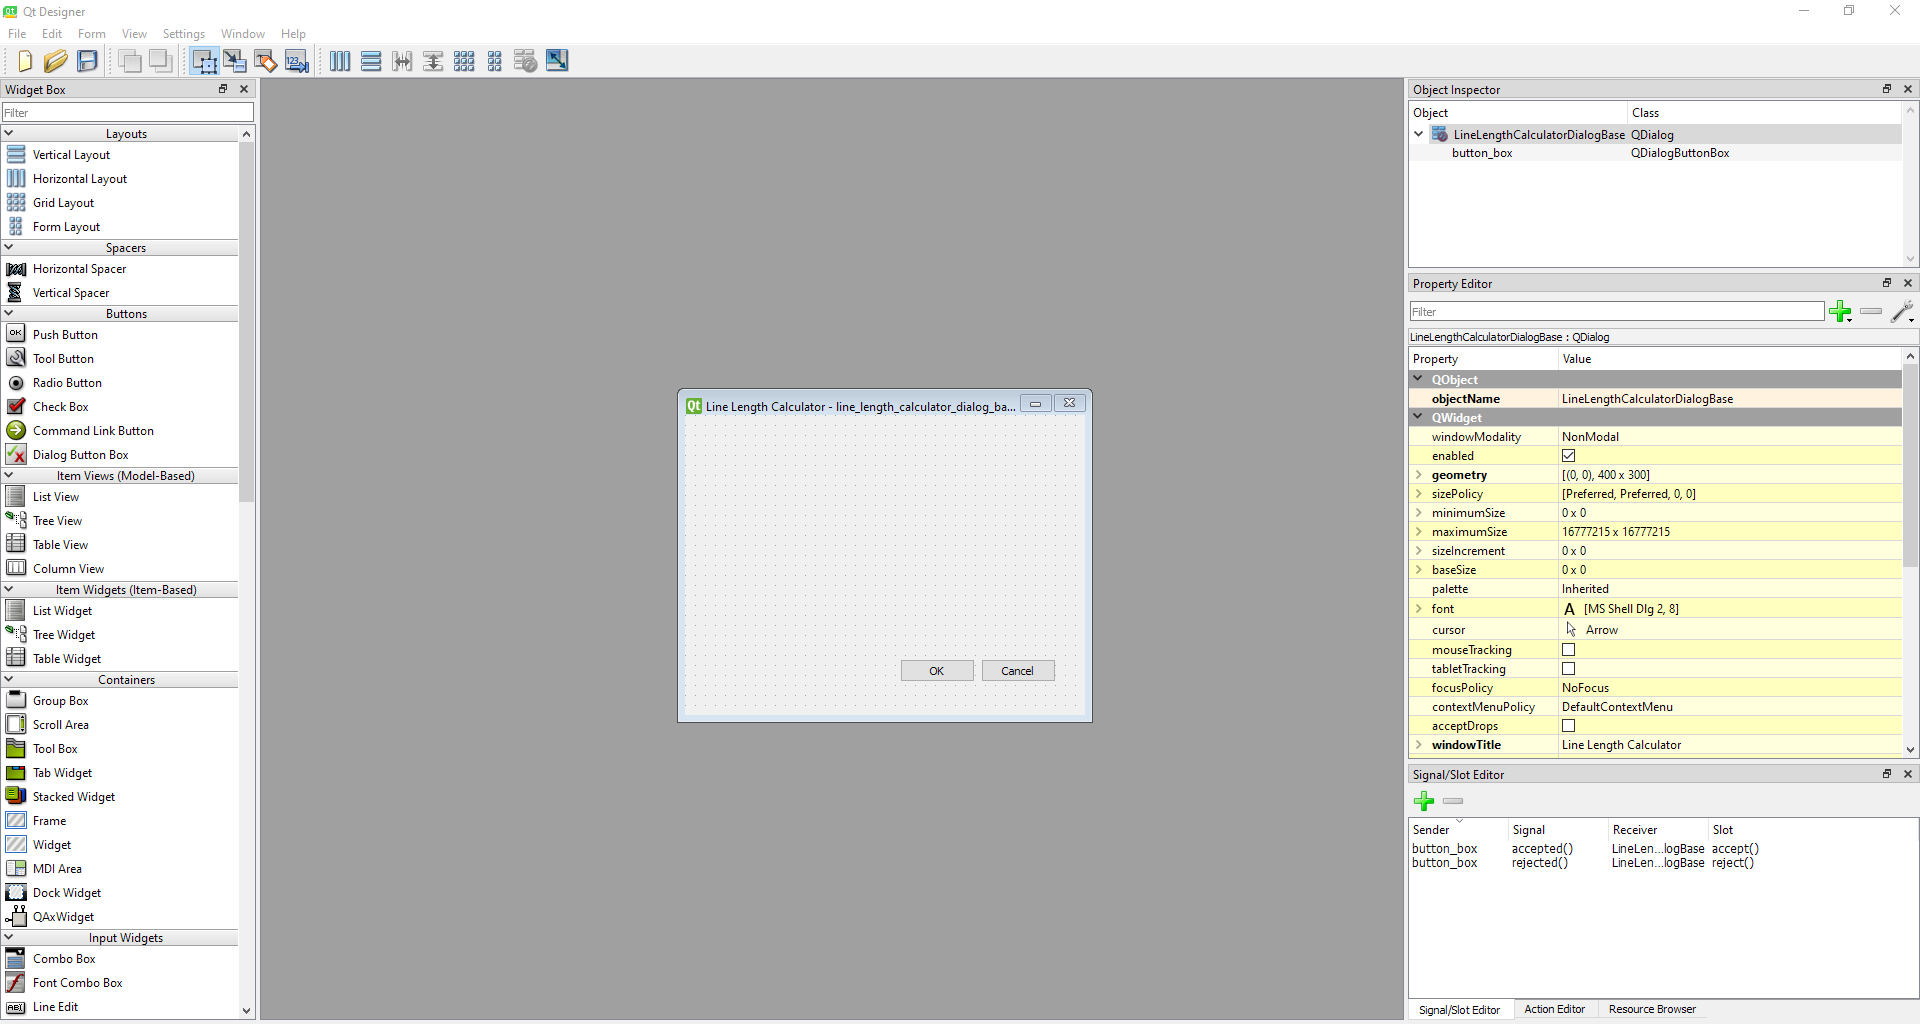
qt_designer beginning
On the left you can see a panel of different ui elements, or widgets. There are options ranging from lists, sliders and text boxes to QGIS specific widgets like coordinate extent boxes. On the right you can see objects inserted in the plugin base and modify their attributes. Nothing there except for the default Ok/Cancel button box.
Time to populate the plugin. Drag a Push button to the middle of the plugin. You may resize it to be more noticiable. Also notice how a pushButton object has been added to the list in Object inspector. Select it and modify a few things in the property editor directly below it.
Change objectName from pushButton to lineLengthButton.
Scroll down and:
Change text from PushButton to Calculate line lengths. The text in the button should change immediately.
The result should look something like below:
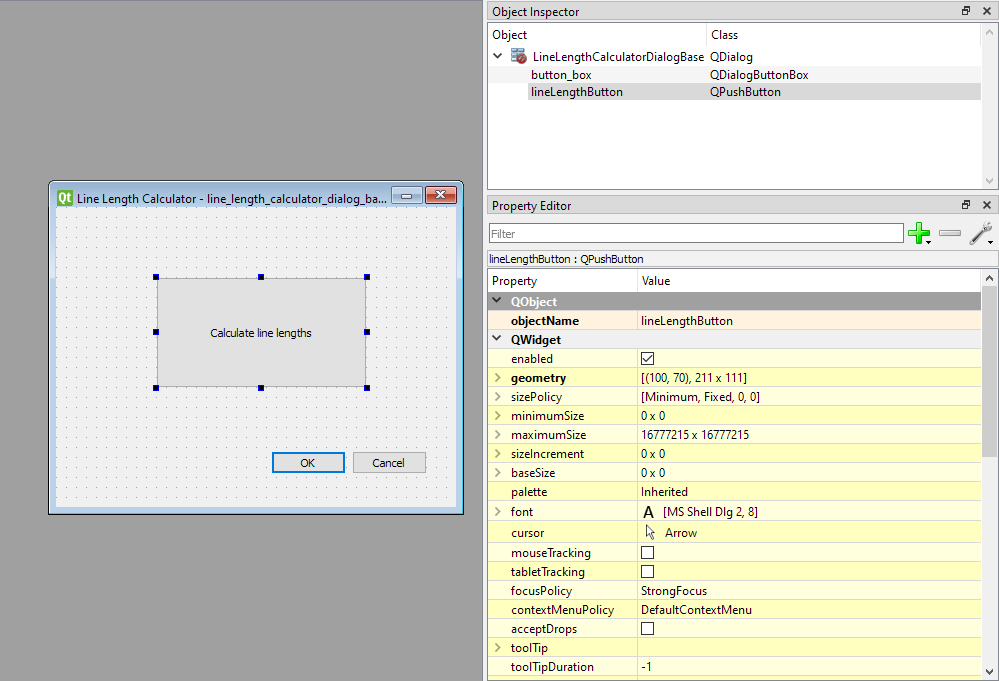
qt_designer end
Aaand we’re done here! Save the changes and close Qt Designer.
Linking UI to code
Our final task in this exercise is to link the method created earlier to this button so that every time the user clicks on the button, the line length method is called. All we need is a few additions and modifications to the code.
UI elements in Qt send something called signals when various things happen to them – they’re for example clicked and so a signal is sent out. We need to tie this signal to a slot that could e.g. be a method that’s run.
Let’s do just that. Paste the bottommost line of code to run method, below the conditional clause if self.first_start == True:*:
if self.first_start == True:
    self.first_start = False
    self.dlg = LineLengthCalculatorDialog()
    self.dlg.lineLengthButton.clicked.connect(self.lineLengthCalc)
Transforming that line into plain language, it reads:
In this dialog, every time lineLengthButton is pressed, run the method lineLengthCalc.
The very very final thing is to modify lineLengthCalc sligthly. Add a reference to self as the method’s parameter (wanna know why? Read this):
def lineLengthCalc(self):
Also add self in front of iface. Like this:
layer = self.iface.activeLayer()
All in all, the bottom of the file should look something like this:
def run(self):
    """Run method that performs all the real work"""

    # Create the dialog with elements (after translation) and keep reference
    # Only create GUI ONCE in callback, so that it will only load when the plugin is started
    if self.first_start == True:
        self.first_start = False
        self.dlg = LineLengthCalculatorDialog()
        self.dlg.lineLengthButton.clicked.connect(self.lineLengthCalc)

    # show the dialog
    self.dlg.show()
    # Run the dialog event loop
    result = self.dlg.exec_()
    # See if OK was pressed
    if result:
        # Do something useful here - delete the line containing pass and
        # substitute with your code.
        pass

def lineLengthCalc(self):
    """Sums together the length of features in a line type vector layer, then prints the result in km."""
    # get the current active layer
    layer = self.iface.activeLayer()

    total_length = 0

    for feat in layer.getFeatures():
        geometry = feat.geometry()
        total_length += geometry.length()

    # print out the result
    print("Total length of features in layer "+ layer.sourceName()+ " is:",
          round(total_length/1000, 1), "km")
Gongrats, you’ve created your very first QGIS plugin! Time to enjoy the fruits of your labor.
Save line_length_calculator.py. Then return to QGIS and reload your plugin with Plugin reloader for the changes to take effect (alternatively restart the whole program).
The plugin should look something like this and function identically to the script made above.

Task
There are many ways to expand this simple plugin. Can you, for example, think of a way to check that the layer object is not empty (which results in an error)? Or let user select the layer from a drop-down box instead of using the active layer? (Hint)
Additional resources
You’ve been very briefly introduced to PyQGIS and Python plugin development. If the subject interests you, we strongly recommend checking out these more extensive tutorials and resources:
Python in QGIS
Anita Graser’s beginner-friendly PyQGIS 101: Introduction to QGIS Python programming for non-programmers
PyQGIS Developer Cookbook with compehensive tutorials.
Gary Sherman’s book (available for purchase) The PyQGIS Programmer’s Guide
Reading the source code of installed plugins for further ideas
Getting started with plugin development
QGIS 3 plugin development guide by Nils Nolde
Building a Python Plugin (QGIS3) by Ujaval Gandhi